
Project notes · 18 ago
How to create a Raspberry Pi-Cloud
Introduction
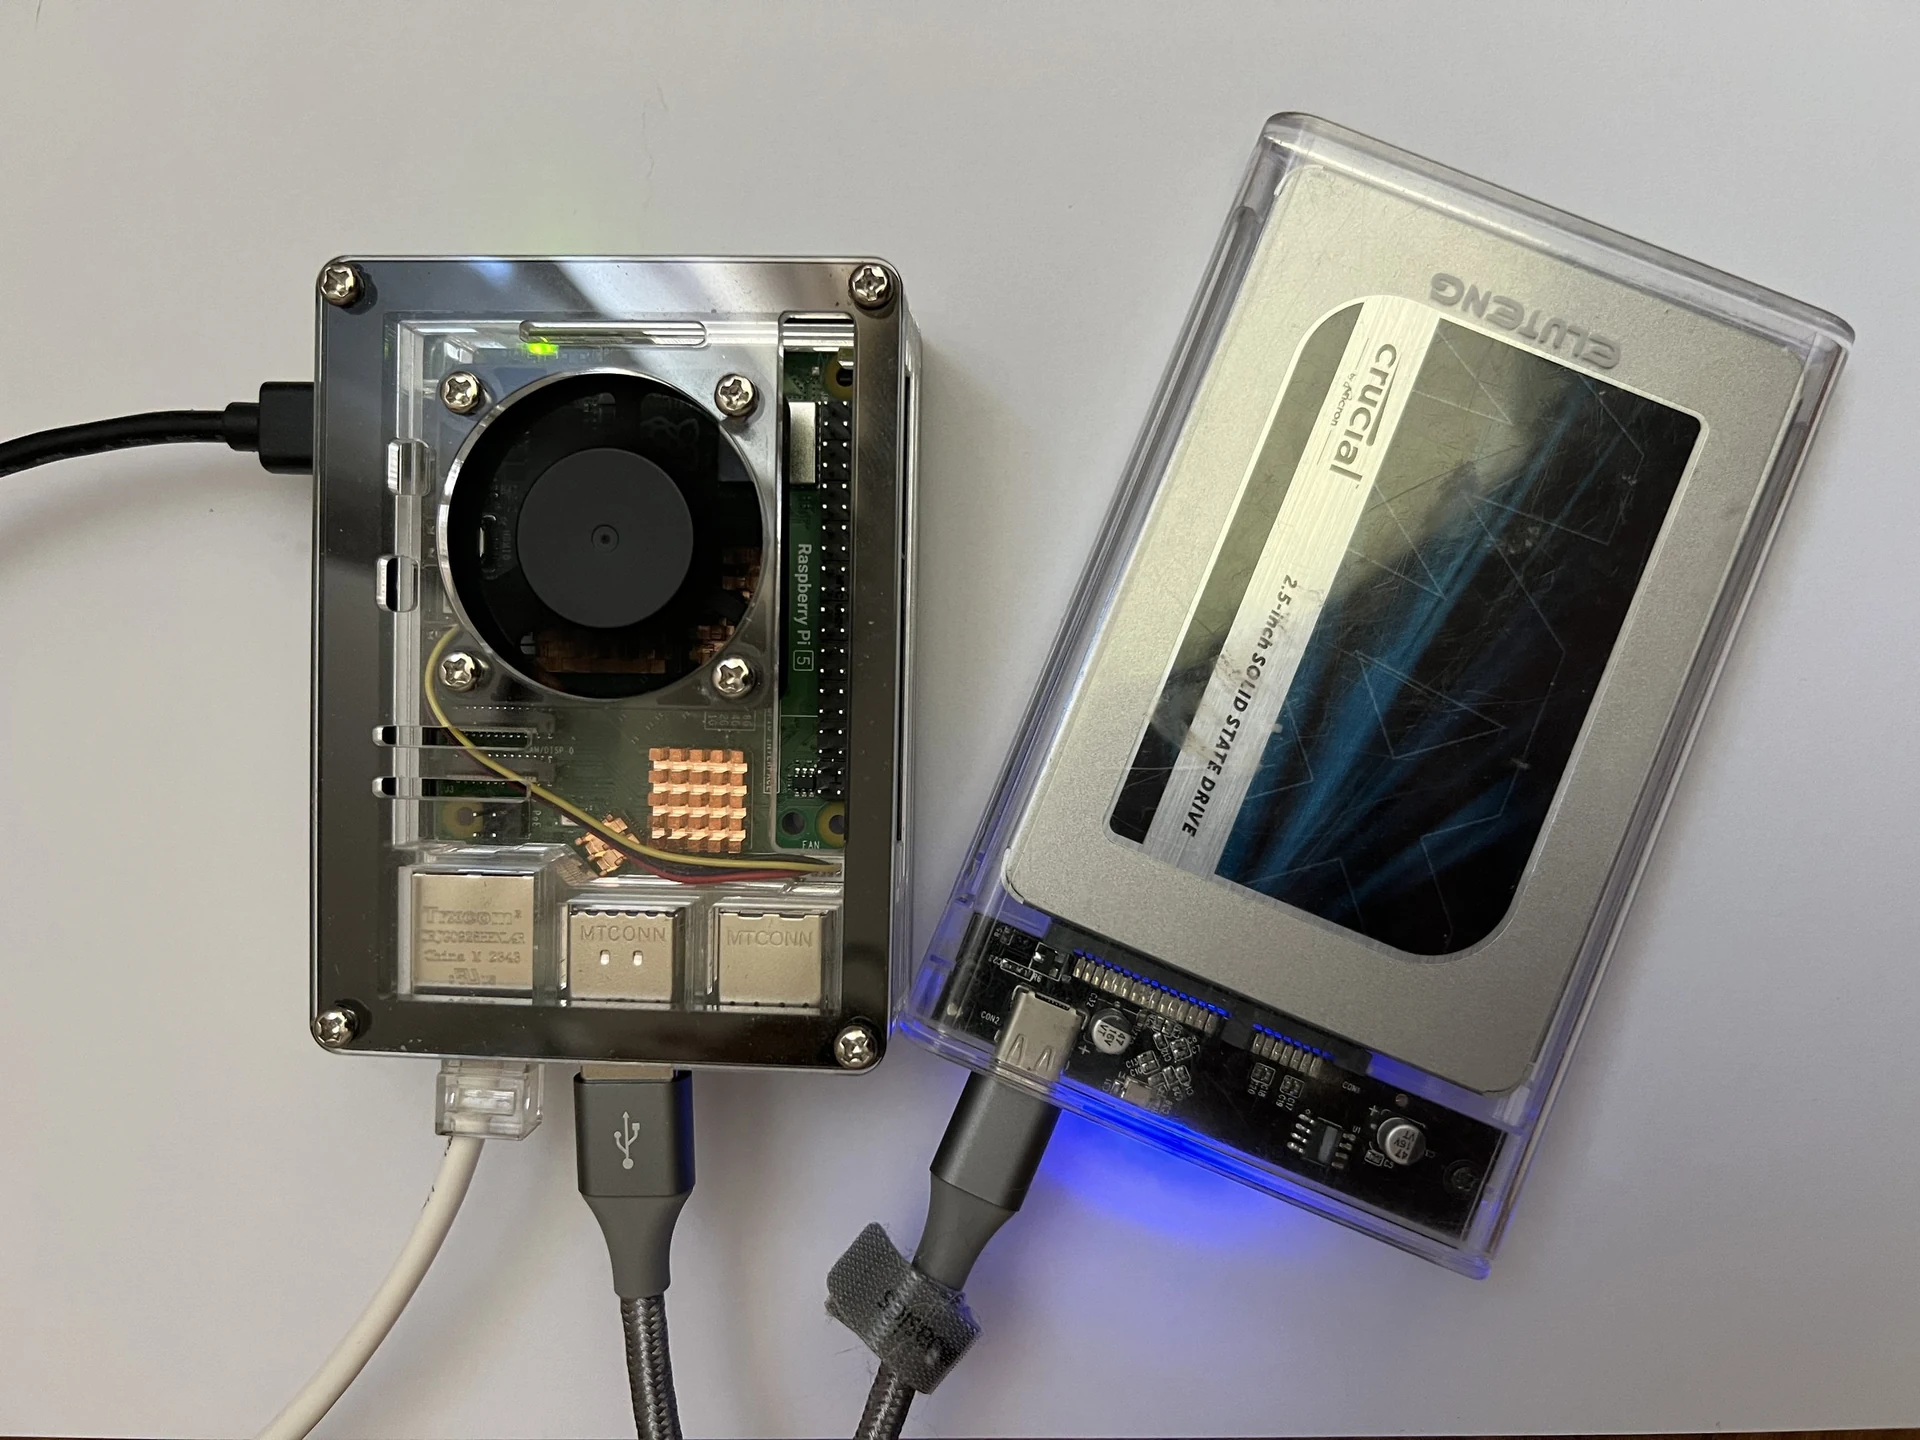
I've always wanted to have my own personal cloud - something reliable, private, and always accessible without relying on services like Google Drive or Dropbox. That's how I ended up building my own Nextcloud server using a Raspberry Pi and a 2TB SSD. In this post, I’ll walk you through my whole setup process, share some tips I learned along the way, and show you how you can build your own!
Index
Hardware needed
Base installation and setup
Setting up Nextcloud
Securing access with Cloudflare Tunnel
Backup and security measures
Final optimizations
Conclusion and future improvements
1. Hardware Needed
Here's the hardware I used:
Raspberry Pi (4 or 5)
SSD 2TB (instead of a huge 20TB HDD, so I avoided complex partitioning or formatting issues)
SSD to USB 3.0 adapter
Official Raspberry Pi power supply
MicroSD card (only for initial setup if needed)
Raspberry Pi case with cooling fan (recommended)
I installed Raspberry Pi OS directly onto the SSD, skipping the microSD card completely after the first boot.
2. Base Installation and Setup
Step 1: Install Raspberry Pi OS on the SSD
Flash Raspberry Pi OS onto the SSD using Raspberry Pi Imager.
Connect SSD to Pi and boot up.
Step 2: Basic setup
Set up Wi-Fi.
Update packages:
sudo apt update && sudo apt upgrade -yEnable SSH for remote access:
sudo systemctl enable ssh
sudo systemctl start ssh
SSH command to connect:
ssh pi@<your_pi_ip>Optional: If SSH complains about keys:
rm .ssh/known_hostsStep 3: Install Docker and Portainer
Install Docker:
curl -sSL https://get.docker.com | shInstall Portainer to easily manage Docker containers:
sudo docker volume create portainer_data
sudo docker run -d -p 9443:9443 \
--name=portainer \
--restart=always \
-v /var/run/docker.sock:/var/run/docker.sock \
-v portainer_data:/data \
portainer/portainer-ce:latest
Access Portainer at https://your_pi_ip:9443
3. Setting Up Nextcloud
Using Portainer made the deployment easy. I followed a template based on Pi-Hosted:
Docker Compose settings:
services:
  nextcloud:
    image: linuxserver/nextcloud
    container_name: nextcloud
    environment:
      - PUID=1000
      - PGID=1000
      - TZ=America/New_York
      - MYSQL_PASSWORD=raspberry1
      - MYSQL_ROOT_PASSWORD=raspberry1
    volumes:
      - /home/wwwroot/data:/data
    ports:
      - 5443:443
restart: unless-stoppedNote: Data is saved in
/home/wwwroot/data.
After starting the container, Nextcloud was available at https://your_pi_ip:5443
4. Securing Access with Cloudflare Tunnel
Instead of exposing ports on my home network, I used Cloudflare Tunnel:
Create a tunnel following Cloudflare’s guide.
Example command:
cloudflared tunnel create nextcloud-piConnect your tunnel to
localhost:5443.Cloudflare provides a secure public URL (with HTTPS!) without needing to open router ports.
5. Backup and Security Measures
Regular backups of
/home/wwwroot/datausingrsync.Enabled Nextcloud's server-side encryption.
Used fail2ban to protect SSH.
Set up cron jobs for Nextcloud's background tasks.
Some useful commands:
List installed apps:
sudo -u www-data php occ app:listRemove an app:
sudo -u www-data php occ app:remove <app_name>View logs:
sudo tail -f /var/www/nextcloud/data/nextcloud.logExtra tip: To access recovery partitions or backups via SSH:
sshfs pi@192.168.1.63:/dev/sda1 /mnt/recovery6. Final Optimizations
Inside config.php of Nextcloud, I added:
'memcache.local' => '\\OC\\Memcache\\APCu',
'filelocking.enabled' => true,
'memcache.locking' => '\\OC\\Memcache\\APCu',
This improved the overall performance significantly.
Also, I made sure to limit upload size and optimize database settings for better performance.
7. Conclusion and Future Improvements
Setting up my own cloud server with a Raspberry Pi was one of the best DIY projects I’ve done. It’s stable, fast, and extremely satisfying to manage your own data privately.
Future upgrades I’m considering:
Adding external backups (maybe on another Raspberry Pi).
Trying Nextcloud’s OnlyOffice integration.
Monitoring the system with Prometheus + Grafana.